Epoxy Grout is a durable joint-filling material made from epoxy resin, hardener, and graded aggregates. Unlike traditional cement grout, it resists many stains, chemicals, and moisture-related problems. This makes it useful in kitchens, bathrooms, hospitals, commercial kitchens, and demanding industrial areas.
A properly installed epoxy joint can look smooth and remain easier to clean. Picture a shower floor where soap, water, and daily foot traffic meet every morning. Epoxy Grout can help protect the narrow spaces between tiles in that environment. It also bonds strongly when the tile surface is clean, dry, and correctly prepared. However, it is not a universal fix. Movement, poor substrate preparation, or incorrect mixing can still cause failure.
Installation requires careful timing. Epoxy materials may become difficult to spread as they cure, especially in warm rooms. Experienced installers usually work in small sections and remove residue before it hardens. Manufacturer instructions should guide mixing ratios, working time, cleaning methods, and curing conditions. A small test area is wise, although it may feel unnecessary during a rushed project. Different products also perform differently, so one brand’s results cannot represent every epoxy formula.
This guide explains what Epoxy Grout is, where it works best, and how professionals use it. It also examines its limitations, maintenance needs, and common installation mistakes. The goal is practical guidance, not exaggerated promises. Good results depend on the product, the surface, and the person applying it.
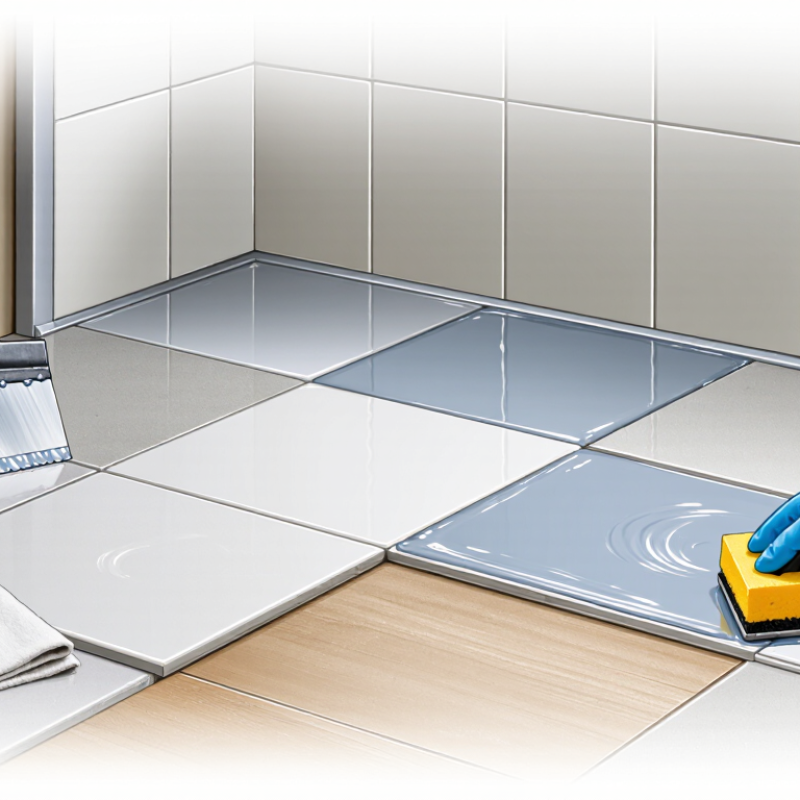
Epoxy grout is a two-component filling material made from epoxy resin and a hardener. Unlike cement grout, it cures through a chemical reaction, not hydration. This creates a dense, low-absorption joint between tiles. ANSI A118.3 classifies epoxy grout for demanding tile installations, including areas exposed to moisture, stains, and chemicals.
It is commonly used in commercial kitchens, hospitals, laboratories, shower floors, and swimming pools. The U.S. Environmental Protection Agency estimated 600 million tons of construction and demolition debris in 2018, showing why durable materials matter in renovation work. Epoxy grout can reduce replacement frequency, but it is not automatically the best choice. It costs more, feels stickier during installation, and may leave a haze if cleaning is delayed.
Work carefully. Mix only the stated ratio and use a short working batch. ASTM C395/C395M provides testing guidance for chemical-resistant epoxy mortars and grouts. Field experience shows temperature changes working time significantly. Warm rooms shorten it. Cooler rooms slow curing. A professional installer should check tile porosity, joint width, chemical exposure, and movement conditions before application. Some mistakes remain visible for years. That part deserves more attention.

Epoxy grout is a two-part joint filler made from epoxy resin and a chemical hardener. Silica or quartz aggregate provides body, while pigments and minor additives control color, texture, and workability. When mixed, the resin cures through a chemical reaction rather than simple water evaporation. This creates a dense, low-porosity material.
The numbers matter. ANSI A118.3 testing limits water absorption to 0.5% after seven days, helping explain epoxy grout’s resistance to staining and moisture. The Tile Council of North America also identifies epoxy grout as suitable for demanding wet and chemical-exposure areas when correctly selected. It resists many household cleaners, oils, and food acids better than cement-based grout. Still, resistance is not universal. Strong solvents and prolonged heat may damage the surface.
Epoxy grout also keeps its color well. Often.
Its main weakness is installation sensitivity. The mixture has a short working time, and a thin film left on tile can become difficult to remove after curing. A cool, clean sponge and frequent water changes are practical safeguards. Smooth porcelain usually cleans easily, but textured tile can trap resin in tiny valleys. Some installers prefer epoxy in commercial kitchens, shower floors, and laboratories. Yet it can feel less forgiving under a trowel, and poor joint preparation may remain visible forever. ANSI A118.3 results describe tested performance, not every jobsite condition. Temperature, mixing accuracy, joint depth, and cleaning technique still decide the final result.
Epoxy grout is commonly used where tile joints face water, stains, chemicals, or heavy cleaning. It combines resin and hardener, creating a dense joint that resists absorption better than traditional cement grout. According to Grand View Research’s 2024 Ceramic Tiles Market report, the global ceramic tile market was valued at approximately $227.5 billion in 2023. That scale reflects the growing need for durable joint materials in busy buildings.
Commercial kitchens are a major application. Grease, food acids, hot water, and frequent pressure washing can quickly expose weak grout. Epoxy grout also suits hospitals, laboratories, breweries, and food-processing rooms, where hygiene and chemical resistance matter.
In showers and bathrooms, it helps limit water penetration around porcelain or ceramic tiles. Swimming pools use it around submerged tiles, although the installer must follow the project’s waterproofing design. The Tile Council of North America and ANSI A118.3 provide recognized guidance for epoxy grout selection and installation.
It is not maintenance-free. Epoxy can discolor under strong sunlight, and poor mixing may leave soft or sticky joints. I once underestimated cleanup time; the residue hardened like a thin plastic film. That mistake is easy to avoid, but only with careful timing. Large floors, shower walls, and commercial counters benefit most when joint width, tile type, chemical exposure, and cleaning routines are assessed before installation. Small residential repairs may not justify its higher cost or more demanding application.
Epoxy grout is a resin-based joint filler made from epoxy, hardener, and fine aggregates. It resists stains, moisture, and many household chemicals better than cement grout. I use it where tile joints face heavy cleaning or frequent water exposure. Preparation decides much of the result. Remove dust, loose adhesive, and standing water from the joints. Check that the tiles are firmly fixed.
Mix only the amount you can use within its working time. Follow the specified resin-to-hardener ratio exactly. Scrape both components from the container sides. Poor mixing can leave soft or sticky patches. Press the grout diagonally across the joints with a rubber float. Hold the float at a low angle, then make several passes. This packs the material deeply. Remove excess grout while it is still workable. Do not wait too long. Epoxy residue becomes difficult to clean after curing.
Tips: Work in small sections, about one square metre at a time. Keep two buckets ready: one for the first wash and one for the final wash. Use a damp sponge, not a soaking one, and rinse it often. Check the surface under side lighting; haze can hide around tile edges. A test patch helps confirm color and cleaning time. I sometimes underestimate how quickly epoxy stiffens, especially in a warm room. Cooler conditions may improve working time, but always follow the product instructions. Allow the joints to cure before exposing them to water or heavy traffic.
Epoxy grout is dense, stain-resistant, and less porous than cement grout. ANSI A118.3 performance criteria limit water absorption to 0.5% or less. That makes routine cleaning easier, but not effortless. The Tile Council of North America’s 2024 Handbook recommends following the grout manufacturer’s curing and cleaning instructions. In practice, timing matters. Cleaning too early can dull the surface. Waiting too long can leave a hard haze around tile edges.
After curing, sweep or vacuum loose grit. Then use warm water and a pH-neutral cleaner. Work in small sections with a soft nylon brush. Avoid abrasive pads, steel wool, and strong acids. They may scratch tile or weaken nearby sealants. Rinse with clean water, then dry the joints with a microfiber cloth. I have found that cloudy residue often comes from dirty rinse water, not defective grout. That mistake is easy to repeat.
Tips: Wipe spills quickly, especially coffee, oil, and colored sauces. Check shower corners monthly. Look for darkening, loose joints, or trapped soap film. For stubborn deposits, test a diluted alkaline cleaner in a hidden area first. Never mix cleaning chemicals. The U.S. Environmental Protection Agency advises reading product labels and improving ventilation during cleaning. A small fan helps. Still, ventilation alone cannot fix neglected grout. Maintenance needs patience, and occasional professional inspection is sensible in busy kitchens or wet rooms.
| Aspect | Practical Information | Typical Use or Timing | Important Considerations |
|---|---|---|---|
| Definition | Epoxy grout is a non-cementitious grout made from a resin component and a hardener or filler component. The components are mixed before application and cure into a dense joint-filling material. | Used during tile installation or renovation. | The two components must be mixed in the correct proportion according to the product instructions. |
| Main Properties | It generally offers low water absorption, good resistance to staining, and better resistance to many household chemicals than ordinary cement-based grout. | Useful where joints are exposed to frequent moisture, spills, or heavy cleaning. | Chemical resistance varies by formulation and by the chemical involved; consult the technical instructions for demanding applications. |
| Suitable Locations | Common applications include showers, bathroom floors, kitchen backsplashes, commercial food-preparation areas, healthcare spaces, swimming-pool areas, and other tiled surfaces requiring durable joints. | Especially appropriate for wet or heavily used areas. | Confirm that the grout is compatible with the tile, joint width, substrate, and expected exposure. |
| Advantages | Epoxy grout can provide durable, color-consistent joints and usually does not require sealing after it has fully cured. | Suitable for installations where reduced staining and simplified sealing requirements are priorities. | It is typically more expensive and less forgiving to install than cement-based grout. |
| Installation Cleaning | Remove grout haze and residue from the tile surface while the material is still within its workable cleaning period. Use the cleaning method and cleaner specified for the grout system. | During installation and before the grout fully hardens. | Cured residue is much harder to remove and may require specialized removal methods that can damage tile surfaces. |
| Routine Cleaning | Sweep or vacuum loose dirt, then wash the tiled surface with warm water and a neutral-pH, non-abrasive cleaner. Rinse when necessary and dry or squeegee wet areas. | Regularly; increase frequency in areas with heavy traffic, food residue, or soap buildup. | Test any cleaner on a small inconspicuous area first, especially on natural stone or textured tile. |
| Removing Soap Scum and Grease | Use a cleaner appropriate for the specific residue and tile surface. Allow the cleaner to dwell for the recommended time, gently agitate with a soft brush, then rinse thoroughly. | When a visible film or greasy deposit develops. | Do not allow cleaning chemicals to dry on the surface; avoid abrasive pads that can scratch tile or dull nearby finishes. |
| Products to Avoid | Avoid unapproved strong acids, harsh solvents, abrasive powders, metal brushes, and highly aggressive tools unless the grout and tile manufacturer specifically confirms compatibility. | At every cleaning stage. | A cleaner that is safe for epoxy grout may still damage glazed tile, natural stone, metal trim, or sealants. |
| Mold and Mildew Prevention | Keep joints and surrounding surfaces clean and dry, improve ventilation, repair leaks, and remove standing water after use. | Daily moisture control and routine inspection in bathrooms and wet rooms. | Epoxy grout resists water absorption but does not eliminate mold growth caused by persistent moisture, dirt, or poor ventilation. |
| Inspection and Repairs | Inspect joints for cracks, gaps, discoloration, debonding, or damage to adjacent sealant. Clean and repair affected areas using a compatible system. | Every few months and after plumbing, impact, or movement-related problems. | Epoxy grout is not a substitute for flexible sealant at movement joints, changes of plane, or perimeter joints where sealant is required. |
| Sealing Requirement | Most epoxy grout does not need a penetrating sealer because its cured surface has low porosity. | Normally no routine resealing is required. | Tile, natural stone, or adjacent cement-based materials may still require their own compatible sealer. |
| Health and Safety | During mixing and installation, follow the safety data instructions, wear suitable gloves and eye protection, and provide adequate ventilation. | Before, during, and immediately after installation. | Uncured resin and hardener can irritate skin and eyes. Avoid skin contact and follow local disposal requirements. |
Maintenance principle: Clean epoxy-grouted surfaces gently and regularly, remove spills promptly, control moisture, and always verify cleaner compatibility with both the grout and the tile.
© Shipham Valves 2025. All Rights Reserved.
Website By PS Website Design Ltd
Request a Quote/Further Information
Download
We use cookies on this website, by continuing to browse the site you are agreeing to our use of cookies. Find out more.