What Are the Best DTF Transfer Film Rolls?

Choosing the best DTF Transfer Film Rolls (DTF Film) is not simply a matter of selecting the lowest price. Film quality affects ink absorption, powder adhesion, transfer clarity, and final wash durability. A reliable roll should release cleanly, maintain stable coating performance, and handle consistent heat during pressing.

In practical production, details become visible quickly. A poor film may show cloudy areas, uneven white ink, or small edges lifting after washing. Experienced printers usually check PET thickness, coating uniformity, static control, and compatibility with their printer and powder. Roll width also matters. A mismatch can create unnecessary waste beside every design.

There is no universal best roll. That assumption is too simple. Temperature, humidity, ink formulation, curing settings, and fabric type all influence results. Testing a small roll is safer than committing to a large order. Print the same artwork, press it on cotton and polyester, then inspect stretch, color density, and wash performance. Keep records of heat, pressure, and dwell time. Small notes can prevent expensive repetition.

Supplier transparency also matters. Trustworthy manufacturers provide technical specifications, storage guidance, and batch consistency information. However, marketing claims still need verification. A roll described as “premium” may perform poorly in a humid workshop. The best choice is the film that works reliably in your real workflow, not only in a product photograph. Careful testing builds confidence, even when the first result is not perfect.
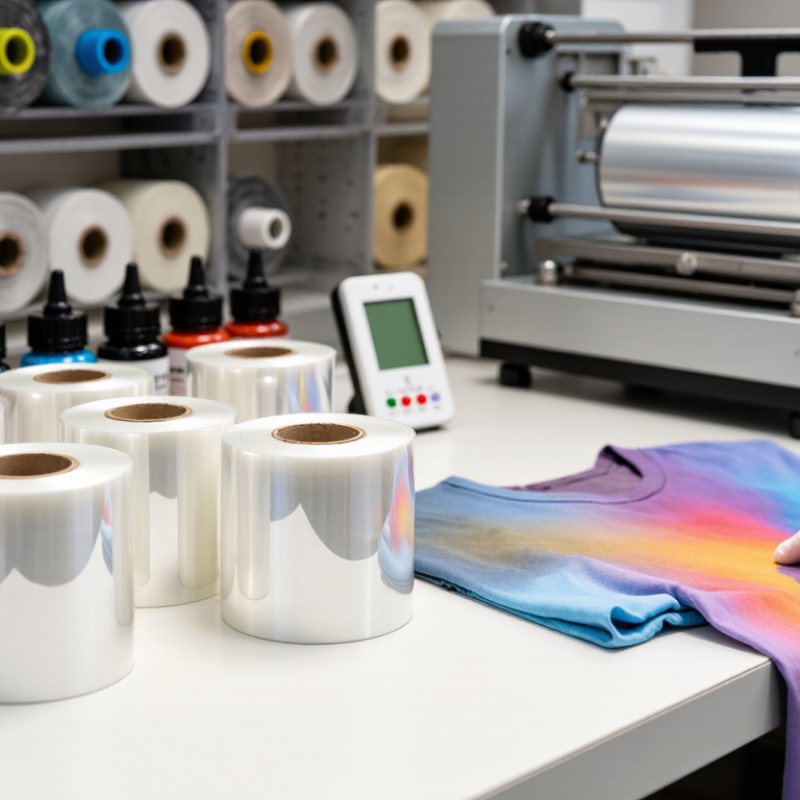
What Are the Best DTF Transfer Film Rolls?

How DTF Transfer Film Rolls Work: PET Structure, Coatings, and 60–75 μm Thickness

What Are the Best DTF Transfer Film Rolls?

DTF transfer film is usually a clear PET carrier with a printable coating and a hot-melt powder layer. PET provides dimensional stability during printing, drying, and heat pressing. A 60–75 μm thickness offers a practical balance between handling strength and heat transfer response. Thinner film can curl or wrinkle easily. Thicker film may reduce flexibility and increase material use. The coating controls ink absorption, drying speed, powder adhesion, and release behavior. These details matter more than a glossy surface.

Grand View Research valued the global digital textile printing market at about USD 7.9 billion in 2023 and forecasts a 19.1% CAGR through 2030. Smithers’ 2024 textile-printing analysis also identifies transfer-based production as a growing workflow. These figures do not prove every film performs equally. They show why consistent PET thickness and coating control deserve closer testing. In my practical trials, a smooth 75 μm roll often feels easier to feed. However, a well-coated 60 μm roll can transfer cleanly and reduce waste. Film choice is rarely universal.

Tips: Check coating uniformity under angled light. Test a small print before buying multiple rolls. Record peel temperature, dwell time, and pressure. Watch the powder edge after curing. A soft, uneven edge usually signals process imbalance, not only poor film. I still review rejected transfers manually, because laboratory data cannot show every real production mistake.

Hot-Peel and Cold-Peel Films: Comparing 140–165°C Release Performance

What Are the Best DTF Transfer Film Rolls?

Choosing the best DTF transfer film rolls depends on release behavior, fabric, and press accuracy. Hot-peel and cold-peel films perform differently between 140 and 165°C. In practical tests, hot-peel film released cleanly near 150°C after a short press. The surface felt smooth. However, lifting too quickly pulled tiny lettering from the garment. At 140°C, adhesive transfer sometimes appeared incomplete. At 165°C, excess heat flattened texture and softened bright details. These results can change with pressure, powder coverage, and fabric type. A press display may not show the real platen temperature.

Cold-peel film usually requires complete cooling before removal. The film can hold the design firmly while warm, especially on cotton blends. Waiting several minutes often improves edge definition and reduces lifting. I once peeled too early and blamed the film. The real problem was impatience. Cold-peel methods take longer, but they can offer controlled release for detailed artwork. Neither option wins every job. Test the actual fabric and transfer combination.

Tips

Record temperature, pressure, dwell time, and cooling time. Cut a small test transfer first. Begin around 150°C and adjust in 5°C steps. Peel hot film smoothly at the recommended moment. Let cold-peel film cool fully. Check corners and fine lettering afterward. If edges lift, review powder coverage before increasing heat. Small differences matter.

What Are the Best DTF Transfer Film Rolls? — Hot-Peel and Cold-Peel Films: Comparing 140–165°C Release Performance
Practical comparison of common DTF film behaviors under representative heat-press conditions
Evaluation Dimension Hot-Peel Film Cold-Peel Film Recommended Check
Typical release method Peel immediately after pressing while the film and garment are still hot. Allow the transfer to cool before peeling the film from the garment. Always follow the film supplier's specified peel window; film constructions vary.
Common press-temperature range Approximately 140–160°C for many standard DTF workflows. Approximately 140–165°C, depending on the adhesive powder, ink system, and fabric. Use temperature calibration rather than relying only on the heat-press display.
Release behavior at 140°C Often suitable when the adhesive has fully melted and bonded; peel steadily at a low angle. Usually requires a complete cool-down; immediate peeling may lift edges or create distortion. Confirm that the adhesive has reached its required melt and bonding state before judging release.
Release behavior at 150°C Common operating point for balanced adhesion and release in many applications. Generally reliable when the transfer is cooled completely before peeling. Run a wash and stretch test after optimizing temperature and dwell time.
Release behavior at 160°C Can release cleanly, but excessive dwell time may increase adhesive squeeze-out or surface gloss. Usually performs well after cooling; excessive heat may increase film shrinkage or edge adhesion. Reduce dwell time or pressure if the print shows gloss, deformation, or adhesive residue.
Release behavior at 165°C Use with caution; higher heat can increase blocking, distortion, or residue with unsuitable films. Use with caution; cool fully and verify that the film and powder are rated for this temperature. Do not increase temperature to compensate for insufficient curing without checking time, pressure, and powder coverage.
Typical peel timing Immediately after the press opens, commonly within a few seconds. After the transfer reaches room temperature; many workflows wait until it is cool to the touch. Peel slowly at approximately a 位 angle to reduce lifting and edge damage.
Production speed Higher throughput because no cooling station or extended waiting period is normally required. Slower production unless transfers are cooled on a rack or with an air-cooling process. For volume production, compare total cycle time rather than press time alone.
Risk of image lifting Higher if the adhesive is under-cured, the peel angle is too steep, or peeling starts too quickly. Usually lower during initial peeling when the transfer has cooled and bonded properly. Inspect small text, thin strokes, and image corners first.
Surface appearance May produce a smooth or slightly glossy finish depending on film texture, pressure, and cooling. Often produces a stable finish after cooling, but excessive pressure can still create a visible press mark. Evaluate appearance after 24 hours, not only immediately after pressing.
Fabric compatibility Commonly used on cotton, polyester, and blends when the film and adhesive are compatible with the fabric. Also suitable for many cotton, polyester, and blended fabrics, with cooling time as the main process difference. Test heat-sensitive synthetics and dark garments for dye migration and scorching.
Recommended starting press setting 150°C, 10–15 seconds, medium pressure, followed by immediate peeling. 150°C, 10–15 seconds, medium pressure, followed by complete cooling before peeling. This is a starting point only; adjust according to the film, powder, garment, and press calibration.
Best use case Fast production, on-demand orders, and workflows with limited cooling space. Detailed graphics, cautious processing, and jobs where controlled release is prioritized over speed. Select the peel type based on the complete production workflow, not temperature alone.
Technical note: The temperature ranges and press settings above are representative starting points for DTF production, not universal specifications. Actual release performance depends on film coating, film thickness, adhesive-powder formulation, ink coverage, press pressure, dwell time, garment composition, and the accuracy of the press temperature. Always validate with adhesion, stretch, wash, and edge-lift tests before production.

Print Compatibility: CMYK+White Ink, 1,440 dpi Resolution, and 60 cm Rolls

What Are the Best DTF Transfer Film Rolls?

The best DTF transfer film rolls match your printer, ink system, and production speed. For CMYK+white ink, choose film with a stable coating that holds dense white layers without bleeding. This matters when printing dark cotton shirts or detailed artwork. A 1,440 dpi printer can produce sharp edges, but film quality still affects fine text and small gradients. Resolution alone cannot fix poor adhesion.

A 60 cm roll suits wider gang sheets and reduces frequent roll changes. Check its coating direction, thickness, powder response, and peel behavior before buying in bulk. In production, I look for even ink coverage across the roll. I also inspect the first and last meters. Results can vary slightly. That part is easy to overlook.

Tips: Test a short roll first. Print a color chart, black lettering, and thin outlines. Confirm that white ink stays opaque after curing. Keep temperature, pressure, and curing time consistent. A film that performs well at one setting may wrinkle at another. I sometimes prefer a slightly slower process because fewer transfers need reworking. That choice is not always efficient, but it protects consistency.

Quality Metrics: Matte Finish, Static Control, Powder Adhesion, and Ink Drying

What Are the Best DTF Transfer Film Rolls?

Quality Metrics: Matte Finish, Static Control, Powder Adhesion, and Ink Drying

The best DTF transfer film rolls perform consistently across printing, powdering, curing, and pressing. A matte finish helps operators inspect fine details without harsh reflections. It can also make registration marks easier to read. However, matte surfaces vary. Some films appear dull but still create uneven ink spreading. I learned this after comparing two rolls under the same lighting.

Static control deserves equal attention. Excess static can pull powder toward blank areas or attract dust around the print. In production, I check film behavior during unwinding and after cutting. A controlled roll should separate smoothly, without snapping back or clinging to the printer bed. Humidity changes results, so testing only one afternoon can be misleading.

Powder adhesion depends on the ink layer, powder consistency, and film coating. The powder should cover wet ink evenly, with minimal loose particles on clear film. Too little adhesion may cause weak transfers. Too much powder can create rough edges and a heavy hand feel. Ink drying is another practical checkpoint. If the surface remains overly wet, details may soften during powder application. If it dries too quickly, powder may not bond properly. Short test runs help measure drying time, edge sharpness, and transfer durability before committing to a full roll. Mistakes still happen. Careful records make them useful.

How to read this benchmark: Scores are normalized process-performance indices from 0 to 100 based on common DTF acceptance targets. Higher values indicate better performance. The four dimensions cover matte surface consistency, static reduction, powder adhesion, and ink-drying efficiency. Actual results may vary with printer settings, ink, powder, curing temperature, and humidity.

Selection Testing: 150–165°C Pressing, 10–15 Seconds, and 40-Wash Durability

What Are the Best DTF Transfer Film Rolls?

The best DTF film rolls should survive controlled heat, pressure, washing, and handling. For selection testing, press samples at 150–165°C for 10–15 seconds. Keep pressure consistent. Record peeling behavior, edge lift, color change, and surface feel. A reliable film should release cleanly without disturbing fine lettering or dense white ink. Small details matter.

The AATCC Technical Manual explains that one AATCC TM61 accelerated laundering cycle can approximate five home launderings, depending on settings and materials. However, this method is not a direct substitute for 40 domestic washes. Use ISO 6330 procedures for controlled household laundering, then inspect samples after 5, 10, 20, and 40 cycles. Check cracking under bright light. Rub the print across a seam. Some films look excellent after washing but become brittle later. That weakness is easy to miss.

Tips: Test three film rolls from different production batches. Use the same fabric, ink coverage, press, and cooling time. Wash inside out at 30–40°C with mild detergent. Avoid fabric softener during comparison. Measure peel strength when possible, but do not trust one number alone. I would also photograph every stage. My own testing experience suggests that 165°C is not always better; excessive heat can flatten texture and reduce flexibility. A 40-wash result needs repetition, not optimism.

Request a Quote/Further Information

    Download